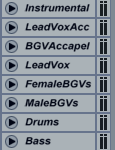
At this point, I’ve downloaded the stems and loaded them into Ableton Live. What follows is my description of that experience, and it gets pretty technical. Â Apologies if you don’t understand the terms – many of them are general to recording, but many are specific to the Live application.
To bring the stems in, I created a track for each one, and dragged each file from Windows Explorer into the lane in Session View. Perhaps dragging into Arrangement view would have been more efficient?
The first thing I had to deal with is the fact that Live wanted to apply warping to many of the clips, because by default, Warp is enabled. Â However, what struck me as odd is that not all of the clips actually had warp markers moved, and I didn’t see a pattern. Â It didn’t really matter, because I disabled warp for all the clips (somewhat tedious), because my intent is to make the tempo match the stems. Â Again, maybe there’s a more efficient way to bring stems in for remix.
Now, I listen to them for the first time, and take inventory:

- Mix (aiff) – full mix
- TV (aiff)Â – everything but lead vocals
- All vocals down (aiff)Â – sounds like a full mix
- All vocals up (aiff)Â – sounds like a full mix
- Lead Vocals Up (aiff)Â – sounds like a full mix
- BGV AÂ Capella (aiff) – all background vocals
- LV AÂ Capella (aiff) – lead vocals
- Instrumental (aiff)
- Lead Vocal (wav)
- Bass (wav)
- Chank EG (wav)
- Drums (wav)
- Female BGVs (wav)
- Lead EG (wav)
- Main Synths (wav)
- Male BGVs (wav)
- Rhythm EG (wav)
- Synth FX (wav)
So it looks like the stems I want are all wav, not the aiffs, which are all various sub-mixes. This is fine, as the aiffs are all 44.1/16, whereas the wavs are all 88.2/24. Â So from here out, I’m going to work exclusively with the wavs (these are the real stems).
 The wav stems are already sub-mixed, panned and processed a bit, anyway, so there is already a limit to how much change they can take. For example, the guitar tracks are all stereo, with the ‘chank’ and ‘rhythm’ guitars already heavily panned to one side.
So when I bring the faders up, I pretty much have the original mix. Â Not what I envisioned – I figured they would be a little more “raw” – but they’re good sounding tracks, at any rate.
The next preparation step I took was to adjust Lives tempo to match the song. Â This way, I can add programmed parts and manipulate the timing of the song as a whole. Â To do this, I turned warp back on for only the “Mix” track, and made it the warp master. Â To begin with, I assume the stems all start at 1.1.1 (they do, in this case), and that the tempo is constant (true again, in this case). Â I dragged the nearest warp marker to the nearest down-beat, and listened to the metronome.
Pretty close, so in order to be sure, I scroll ahead until about halfway through the song and listen there. Â Not surprisingly, the metronome has drifted by this point in the song (it was slow). Â I can see the transient that a down-beat marker is supposed to line up with, so I just drag the marker to match. Â I jump to the last few bars of the song, and repeat the process. Â At this point, I see the metronome at 135.99 bpm. Â This tells me that the real tempo must be 136, so I drag the last downbeat backward (increasing the tempo) until I get the even number. Â Now it sounds perfectly in-line.
Couldn’t I have just typed in numbers until the beats matched? Â Probably, but it would have been more trial-and-error, and I wasn’t sure the pre-roll started on a down-beat. Â By systematically lining up the warp markers with down beats, I truly scaled the tempo map to match the song. Â This process would have worked with a less straight-forward song, or one with a varying tempo.
Next: strip the track bare, so I can build it back up. Â Stay tuned…

